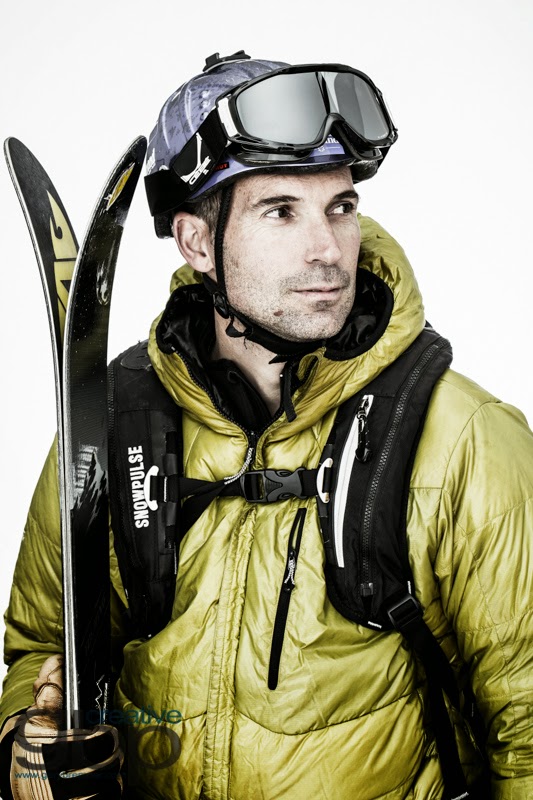
Sweet assignment right??! Problem was, at the time, there was no snow outside for us to use… and a portrait of Claude in normal clothes standing outside in the dirt seemed like a bit of a waste compared to the graphic elements of an awesome skier in full ski gear and the beauty of soft, snowy light. So... the only choice was to hit the studio and make it look like an epic snowy day...Challenge accepted.
SO have you ever been outside on a bright, snowy winter day? The light is rad… it comes from everywhere…well, I mean, it comes from the sun of course, but then bounces off the ground and the trees and everything else that is covered with snow (think giant white reflectors from every direction) and creates this amazing, soft, beautiful wrapping light…..
So in order to get that all encompassing light feeling, we had to ask ourselves, how do we create that in the studio?? Turns out it takes a crap load of lights…. or 5... cause that’s what I ended up using, and a whooooooole lotta reflection.
This was a cool setup because we used the studio "backwards", meaning, instead of having your subject stand in front of the big white backdrop wall, we instead put him at the other side of the room from the big white wall, with the camera's 'back' to the wall instead. Fortunately our studio is painted flat white which makes it easier because this whole thing involves using the walls to create massive soft white light sources. (See super-detailed and very scientific diagram below)
The main thing to watch out for with this set-up is lens flare, as there is a lot of light going everywhere and it makes it really hard to minimize flare (which will washout and reduce contrast in your image)…. I have found that my 100mm f2.8 macro handles flare way better than any other portrait length lens I have, so it wasn't too much of a problem this time.
So, for you lighting nerds out there (oh how we love you guys...we are kindred spirits), here's a little breakdown of what we did...
A : 1 bare bulb light aimed directly up at the ceiling to create the light coming down from above (this was our key light).
B: 2 barebulb lights aimed back behind me to bounce off the back wall and angled ceiling to make our fill (about 1/2 stop under key)
C: 1 diffused uplight to mimic the light bouncing off the snow/ ground (1 stop under key)
D: 1 light behind subject to make our white background completely white and even glow a bit (about a stop brighter than group B lights)
HUGE thanks to Claude for being so great to work with too...turns out he's crazy talented AND an awesome guy...


No comments:
Post a Comment